Pages

Wednesday, September 4, 2013

That's A Wrap Folks!

I am ready to shout, "that's a wrap" to the summer of 2013. With the very light winter past here in the southeast and an abundance of rain, the bug population got a huge leg or wing up this summer. Papaw took this photo of a preying mantis in the garden last week. I am not sure if you can tell but it was almost 6 inches long. Yes I said, 6 inches long! Get your rulers out and mull that one over.

We have been overrun with bugs of all types this summer. The most hated among them for me are, the mosquitoes, gnats and those dog gone squash boring beetles. Those bugs have wreaked havoc all summer long and I am so over them. Can't you almost just invision me stomping my foot and pouting?

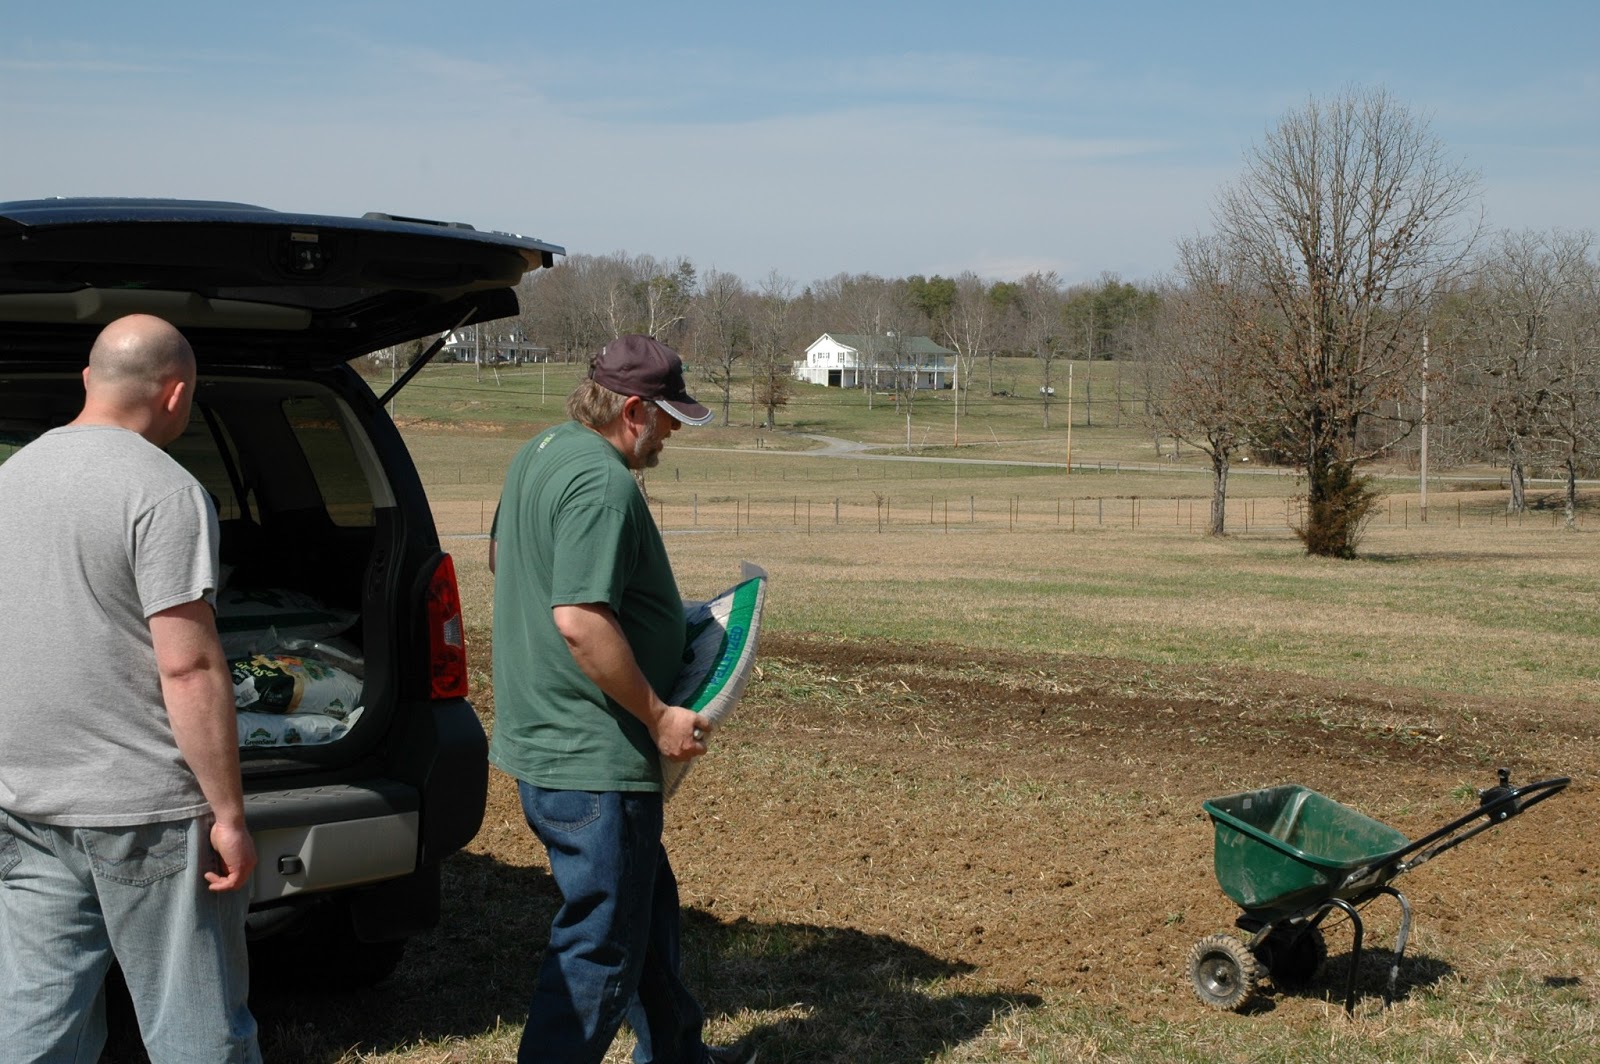
With all the excess rain, nothing really wanted to grow in the garden except for weeds and grass. We did get some veggies but it wasn't bumper crops for sure. You can note all that grass in the photo too.

With all the moisture this summer, there are no need to worry about the extinction of the mosquito and gnat species. They made working in the garden unbearable because, it would take days to recover from being bitten so much. I am a mosquito magnet and tend to be a bit allergic to the bites so, I avoid being bitten almost at all cost. I missed the evenings spent in the garden picking with Papaw like last year. I just couldn't take the bites.

With all my dissatisfaction with summer, my curiosity about winter peaked and I popped over to see what the Farmer's Almanac was predicting for winter this year for the United States. You can read it for yourself here. We need some seriously cold winter to equal the score up with the insect population so, bring on winter. I am ready!!! OK, I say that now. I do hope I am not blogging/whining in February about the cold weather.

I am excited about fall. I am wondering when the real break in the temperature will come. I can't wait for the first cold snap in the air, when walk outside brings a rejuvenation of spirit. To feel the need to lightly bundle up, see your breath in the air and to smell the fresh air with the hints of burning wood from homes in the neighborhood. I do think fall is my absolute favorite time of the year. Oh yes, I am ready for a change. I am ready to say goodbye to 85-89 degree, humid days of summer. Oh well, I guess I should stop complaining and go get on the tractor and do a bit of mowing and trimming around here. Did I mention that I am really tired of mowing grass too? LOL Here's to fall and winter! Forgive me for complaining. I can look on the bright side of it all too. My grass has reseeded several times over this season. I am going to have a fabulous lawn next summer. Oh yea!

Hope you all have had a blessed and maybe less buggy, moisture laden summer than we have.

Many Blessings!

Thursday, August 1, 2013

Saving Seed...

We happened to run across a vendor at the Asheville Farmer's market that had a few pints of an tomatoes called Purple Zebra Cherokee Heirloom.  These are more like a cherry tomato. After a bit of research into the variety, there is a Purple Zebra variety that will grow larger fruit. The vendor allowed us to sample one of these and we liked the flavor. We bought a pint to bring home to enjoy but thought right away about saving see from some to grow them next season.

As it turns out, it is pretty simple to save tomato seed. Although, I had not given much thought to the possibility of the seed needing to ferment before drying. As it turns out, allowing them to ferment for 3 days will help prevent any disease from forming on the seed. It is a pretty simple.


All you need to do is wash the tomatoes, slice them open and scoop out the seeds. I used a small melon baller for this. Once all the seeds are scooped out and placed in a clear jar, simply cover the top with plastic wrap and poke a few holes in the top to allow air to circulate. Place the jar in a window so that it will be exposed to sunlight. Each day, just give the jar a bit of a shake. You will start to notice, the seeds start dropping to the bottom away from the flesh of the tomato.

After 3 days, carefully pour the liquid slowly off the top to allow the tomato flesh to drain off. Then place the seeds in a wire strainer and give them one last short rinse with water. Spread them out on wax paper on a plate and allow them to dry for a few days. Store in a paper envelop to help cut down on the possibility of mold to grow. Once the seeds are completely dry, they can be stored in the refrigerator or a cool, dry place to plant next season. Make sure to note and date the variety.

We are looking forward to seeing how this works out. I'll let you know when I start them in February.

Hope you all are making the best of all that summer has blessed you with.

Many Blessings!

Tuesday, July 30, 2013

Giving Up Paper Towels...

Is it possible to give up paper towels? I think so. A few weeks ago, I read a gals blog that I follow. She wrote a post about giving up paper towels. I honestly can't remember which blog it came from but I wish I could so that I could give credit where credit is due for the idea. It was one of the blogs that I follow or follow along on Facebook. The post was about making non-paper towels and giving up buying paper towels. Now, I am always looking for ways to cut back, save money and natural resources in the process so, I was curious.

After reading her post, I decided this just may be a neat thing to try. I ordered a few yards of diaper cloth from Fabrics.com and got to work. It took me about an hour to make about 30 towels. The measurement is very close to an 11X11 when finished. I measured out a yard of fabric, folded it in half and made two cuts, one at the 12" mark an another at the 24" mark on the cutting board. This gave me three strips of fabric that were 12 inches wide and almost 36 inches long. I proceeded to cut each strip into 12 inch blocks. The fabric is a little shy of being able to make it a true 12 by 12 inch block but it is no big deal. 

Once the blocks were cut and tossed in a pile near my serger, I  loaded it up with multi-colored thread and set out to serging the edges. I tossed them all in a pile and when finished. I used a large eyed needle and tucked the end threads back into the stitching. I then washed them with a load of bath towels.   I added a cup of vinegar to help improve the absorbability.

When they came out of the dryer, Papaw and I folded them long ways and tossed in a basket on the kitchen counter. I still have paper towels on the counter. I had  a large store of them in the pantry but I am retraining myself to grab one of the fabric ones most of the time. I revert to using the paper towels when cleaning bathrooms and wiping down the toilets. I am sure, I will always till have a few rolls of paper towels on hand for cleaning our bathrooms in the future.

The cloth towels made from the diaper fabric are thin but more durable and absorbent than a regular paper towel. I used a single layer of diaper cloth. I suppose if you wanted to have more absorbent towels for cleaning, you could serge a couple of layers together.

We are folks that pull off paper towels and fold them for our dinner napkin so, having fabric replacements for our everyday dinner napkins is a bit of a treat for us.

Little by little, I guess we can all do a few things here and there to scale back. I am all about going green as long as going green makes real sense and does not use more natural resources in the long run. So many times when looking into what seems like a great idea for going green with some things, in the long run really isn't helping the environment, such as solar energy. When one really looks deeply into solar, it is easy to see so much pollution to our planet is happening in the process of making solar panels and batteries and in the restoration of batteries. Going green for us has to make sense all the way around for us. So far, we are thinking that the reusable non paper towel is a good thing. They are small and many can be tossed into everyday loads of laundry without adding too much bulk. It really seems like a smart and economical thing to do for us.

Many blessings,

Mamaw!

Friday, July 19, 2013

Olives Anyone?

Curing olives is certainly a lesson in patients. In November of last year, Papaw and I decided to order fresh green olives and crack and cure them ourselves. We have never tried this before but thought, why not give it a try? We love trying new things. We enjoy time spent together researching the process, harvesting and canning. Curing our own olives sounded like a no brainer and it was. 

I had considered writing a post back in the fall when we started but decided to wait until the olives were ready for storage. I had no idea, for our taste, the curing process would be so lengthy. Curing olives takes patiences. Ripe, green olives are bitter. Removing the bitter flavor can take quite a while, as we found out. For our taste, our curing process took about 5 months which now makes me laugh to think how many blogs I read, suggested their olives were perfectly cured in a few short weeks. Maybe some people really like a bit more of a bitter bite to their olive than we do. For us to develop the flavor we desire, it took quite sometime.


After reading many other’s posts, blogs and info on curing olives we really wanted to give this a try. We ordered our olives from Chaffin Family Orchards

Our olives arrived in about 4 to 7 days after placing the order. They came in a set price shipping box. When opening the box, it was a treat to experience the fragrance of fresh olives. 

We spent a short time picking through and removing olives that maybe were dried out or should not be processed. We didn't really have many of those. 

We did a bit of researching on learning how to process olives. There are two methods. One way is using lye. From what we understood, curing with lye is a quicker method. For us though, the thought of using lye just wasn't so appealing. 

The other method is a brining method using salt. Salt brining sounded simpler and safer to us. 

We found a lot of useful information on processing on the Chaffin Family Orchard website. One of their suggested resources for processing and storing olives was from the University of California. You can read all about the different methods from the university here http://anrcatalog.ucdavis.edu/pdf/8267.pdf

It is pretty simple using the brining method but cracking or splitting the olives does take a bit of time. We decided since the olives were smaller olives, we didn't want to waste any by pitting them first. We don't mind chewing one then tossing the pit. 

We had read that we would need to use a food grade plastic bucket or container for the brining. We happened to have a fermenting bucket that we had purchased at a local wine maker's shop.

Using sea salt and water, we prepared our brine. We split the olives on each side using a knife. Some folks use a small mallet and give them a whack to crack them. The olives have to be split or cracked open a bit to allow the brining liquid to seep inside.
It took us a bit to split them all but we just put on a good movie and went to work on splitting them. Our fingers were a bit discolored when we finished. The olives did stain our fingers and took a few days to fade. You may want to wear rubber gloves during this step if you wish to avoid the staining. 

When finished with all the splitting, we placed a plate on top of the olives to hold them under the brine. We topped the container off with the lid and placed a piece of tape on the top with the date started. 


We left the brining bucket sitting in the kitchen so we wouldn't forget to change the brining solution often. Most things we read suggested doing it daily for the first couple of days. After the first few days, two to three times a week would be fine. We did this for several weeks, tasting each time we rinsed and re-brined the olives. Each time we tasted, we were surprised to see how much of the bitterness was still in the olive. 


Finally after many weeks, the flavor started to mellow a bit. We noticed that the olives had finally stopped floating and were staying under the brine fine without the plate holding them down. A few times when going to change the brine water, we would notice a tiny bit of mold floating on the top of the solution. We always dumped our olives into a strainer, washed and cleaned the brining bucket each time we changed the brine. 


A few weeks ago, we had delicious olives ready to be stored. For storing the olives, we used pickling salt, white vinegar and water to cover the olives. From the process information from the University of California, it suggested that the olives would need to be kept in the refrigerator and could be stored for six months or so. We have a lot of olives to eat in the next few months.

Blessings!


Tuesday, July 16, 2013

Uses For Gigantic Zucchini...

Who hasn't missed a zucchini or two hiding in the garden and before long, you've tripped over a few? Well here is an idea for you, make pasta with it. Most have been trained to think, zucchini that has gotten so big just needed to be fed to the hens, or tossed into the compost pile. You may just want to give it a second though.  If you haven't made it to your garden quick enough to get those zucchini when they are perfect size, not to worry.


 A couple of weeks ago, we found a tool for making noodles from veggies at a local Asian supermarket. It cost about $2.99. We purchased one and brought it home to give it a try. We peeled a large zucchini and cut in half. Laying the flat side of the squash to the cutting board. We stripped the zucchini down and around until we started hitting the seeds and center. We just tossed seeds and centers into the compost bucket.  


We placed the zucchini noodles in a glass dish and microwaved for 2 minutes. It was the was perfect consistency for spaghetti. We could still twirl it onto our fork perfectly, just like traditional pasta. It is so delicious. Honestly, I think from now on we will be using zucchini as our pasta.  We loved it so much, when we popped back in the Asian market, we bought several of the tools to give to family when we shared squash with them. We are so sure that the family will be as hooked as we are on this.


Papaw, with all his muscles spent an hour or so this evening cutting zucchini and I bagged it for the freezer. We froze about 7 to 8 quart sized bags from about 4 oversized squash.

Here is what the noodles look like.

I know many people think zucchini should be picked when small but we are finding that letting a zucchini get larger, just yields more food and it isn't tough. We have taken some of the larger ones and cored them, scraped the seeds and centers out, and tossed into the compost bucket. Then cube it and put it in vacuum sealed bags and freeze. No blanching is required. I have pulled out bags almost a year later, opened and sautéed in a skillet and it is perfect. When blanching, I have found it makes the squash mushy. I do think the Food Saver/vacuum method is perfect for saving squash. We also love the larger cubes. They are perfect for tossing in soups and sauces. We are convinced that washing well and leaving the peelings on just adds nutritional value.

Another idea for oversized zucchini is, stuffed zucchini boats. They also freeze well. I'll post the recipe for those soon.

My reason for sharing this is, maybe when you think a veggie is past its perfect picking time frame, there still may be good uses for it. One thing that is for certain, if it isn't perfect for us, our hens will be grateful. Those gals will eat just about anything from the garden that we need to toss.

So, if you have some overgrown zucchini, give this a try. I have also learned, slicing it lengthwise about 1/8 inch thick, makes a perfect substitute for lasagna noodles. If you want a healthy alternative to lasagna and a twist on flavor, check out my post using sweet potato as the filling instead of lots of unhealthy ricotta and cheese.  http://tnmamaw.blogspot.com/2013/01/healthy-and-delicious-yes-it-is-possible.html


I did make this using zucchini for the noodles just this past week and it was awesome. It does take about 45 minutes to an hour to bake. I covered it with foil for the first 35 minutes then removed the foil to finish for about 15 to 20 more minutes. It is such a delicious and healthy alternative to traditional lasagna. 

Just wanted to share our tips and hope you all find good uses for veggies that may be just a bit larger than ideal size.

Many blessings!

Monday, July 15, 2013

Confessions of a Neglectful Gardener


I have a confession to make...OK, here goes... I totally let the summer get the best of me and things have gotten out of hand around here. I honestly would love to say, I have no idea how this happened but I can't. We got off to a great start in the spring. We tilled, brought in compost and set out our gardens, started seed. I really worked so hard...in the beginning.

We started a new herb garden this year. I have always wanted an herb garden. I gave it careful thought and did a lot of planning. When the time came, I put all of the energy and effort into laying it out and getting it ready to plant. I decided not to use any type of ground cover under the mulch. I WAS GOING TO DEVOTE MY MORNINGS TO WEEDING and a bit of meditation! I was certain that I would keep the grass and weeds under control.  OK so, here are my excuses as to why things got so out of hand.

First, we have had an unbelievable amount of rain at the beginning of summer, which prevented some of the weeding opportunities. I know there still were many mornings that I could have gotten up and got out there to get some of it done but I didn't because the mosquitoes seemed horrible in the mornings because of the rain. So, that was my second excuse.  

At the end of May, my granddaughter’s summer break began and it seemed as if all my good intention regarding gardening went downhill from there.   She and I do not get to spend very much time together anymore since she is back in public school so, when her summer break started, I think I just went on vacation with her. We have been biking, hiking, swimming and when it started getting really hot, we started ice skating, going to the movies and just having fun. So, there you have it. There are my excuses. I know we can all find excuses much more easily than getting the work done. 

Now let me describe the condition of my herb garden because honestly, I am ashamed to photograph it at this point. I can use one word to describe its’ current state, “jungle.” Most things around here seem as if they were growing in a tropical rainforest. Out of control due to the rain, including grass and weeds.  Not to worry though, I have a plan. Below is a photo of what it looked like in the beginning.


A couple of weeks ago when instead of weeding, I was surfing around on the computer. I ran across a very cool gardening tip or suggestion on killing off weeds and grass without using Roundup or one of those products that would linger or you certainly would not want use in a garden or herb garden. The tip was using white vinegar, undiluted as a grass and weed killer. Even if the ph of the soil was a bit out of balance after the fact, adding a bit of lime would solve that problem.

I got busy one evening and dug out my strawberry plants and the other few herbs that I had planted. I treated the areas with the vinegar a few days ago. The article that I read said that it may take a few treatments; however, after the first treatment and waiting a couple of days, I do see it is working.  The grass is dying. Once I do manage to get it all killed off and under control, I am going to lay down a ground cover blanket and re-mulch and then set the plants back into the garden.

So, the moral of my story or the lesson that I am sharing with you is, "listen to your mom." I should have listened to my mother.  Yes mom, you were right! OK, I am certain she would like for me to repeat that again. YES MOM, YOU WERE RIGHT! *grin* She told me when she was up for a visit and helping me with the project, “you should think about putting down a ground cover blanket before mulching.”  I think my response was, “nah, I think I will be able to keep it weeded and under control.” WRONG!!!

On a lighter note, our veggie garden is really doing well. We have a lot of grass growing in there as well but the veggies are still growing great. I am certain it is going to be an awesome year for tomatoes, squashes and okra. We planted corn this year also and it is doing well. I will post a few photos of the garden soon.

I hope you all are having a wonderful summer and your gardens are growing well. I hear here in the south we are in for some really hot days ahead. I hope our gardens all survive.


Many Blessings!

Tuesday, June 4, 2013

Seems Like Forever

OK, so I know it seems like forever since I have written a post and this one is going to be pretty short. I promise soon, I will write again. I think spring fever took over and I felt like a kid being sent out for recess; although, what has felt like play has been a lot of hard work.

We have our veggie garden in and things are coming along, including weeds. Lots and lots of weeds. Urgh! I have been outside working in the yard so much and digging in dirt that blogging has not entered my mind.

I will blog again soon. I have so many photos of what we have been up to around here and just things and thoughts in general that I would like to share so, I'll be back. Until then, I do hope your summer is off to a fantastic start.

Many Blessings!

Monday, March 25, 2013

Spring Fever...


And honestly, I wished someone would clue Mother Nature in. We woke up this morning to snow falling on the daffodils. There is just something that seems wrong about that.

Saturday, Papaw and I sat for three and a half hours in Barnes and Noble pouring through gardening books and talking about what we would like to plant this year. Trying to decided just what to plant, when to plant it and where is truly a science. We are still new at this stuff but loving every moment of learning as we go.


A couple of weekends ago the weather was great and we got the garden turned. 


Joey came out to help us.


When we turned the dirt, we were stunned and happy to see all the worms that have moved in and made themselves at home. I have never seen the like of worms in all my life and big ones too. After it just being a first year garden, it was so neat to see so many worms. I hope the turning of the garden wasn't too hard on them but it is the process for our soil that we have to go with so, yes we use a tractor. It makes light work of turning a spot.

We were able to add our amendments to the soil and turned them in spite of the wind. Now we are having to wait now for the weather to improve and we can have some composting material delivered. We added all the compost that we had going here and I am sure that will help but, we will have to get a load from a local nursery.

I am pretty excited too that finally this year, I will be starting an herb garden up on the hillside. I have thought about an herb garden up there since we first moved here. I have a lot of reading to do in planning it. I will be starting small but hopefully expanding it as the years go by. I am looking forward to harvesting lots of basil for pesto and herbs to add to the fresh veggie dishes this summer.

So, lots of excitement here while and we wait on the weather to improve so we can get started. I am looking forward to feeling the warmth of the sun on my skin, while I play in the dirt. I can’t wait.

Blessings!

Monday, February 25, 2013

Decisions, Decisions...


I maybe should have titled this post “Farming 101


We are certainly looking forward to a few dry days so we can make a few changes concerning the chickens. We have the upcoming and less desirable chores of owning poultry, scrubbing the hen house and raking/scraping the chicken yard and putting a few birds in the freezer. Right now, the chicken yards are a mucky mess with all the dampness we have had through the winter. This time of the year makes me think about the good old days, when we just bought our eggs and chicken from the store like most folks do. 


We have been thinking lately, we have too many chickens for the amount of eggs we are using. We have lots of eggs to share and we do but short of throwing them at folks on their way home, to get them to take them, I don't know what to do with all these eggs. We are constantly bugging family and friends to take eggs. I have learned too, most people just do not eat so many eggs. I do think that I will be checking down at our local Ronald McDonald house to see if it would be OK to take some there from time to time.


So, here are our numbers. We still have two Reds from our first clutch that Doodlebug and I started during her home school days. One of the gals, still gives us an egg almost daily. She is the smallest hen we have and gives the biggest eggs out of all the hens.  I am being truly honest in saying, she is my favorite gal. I've named her "Little Red." The other Red well, she has taken to eating her eggs. She is well nourished but she had one egg to break one day and that was the start of it. Now she breaks every egg she lays and it is time to put her in the freezer as a stewing hen.  Then we have eleven of the Lace Barred Rock hens and two Barred Rock roosters and one Phoenix rooster. You can see in the photo below, our Phoenix. He was a freebie/exotic when we ordered our last straight run.


Most of us learn as we go and we certainly have. We have decided, owning roosters are just not worth the trouble. When we ordered our second group back last summer, we ordered a straight run. We wound up with several roosters which many wound up in the freezer. A few have made awesome pots of soup and dumplings. We are down to three roosters. For what they eat, verses the cost of buying more baby chicks when needed, we have decided to take down our last three roosters. We have weighed the benefits for having them, thinking they would be wonderful protection if we free range our gals but that would raise another expense for us. If we were to free range, we will have to spend quiet a lot of money buying a fencing mesh to wrap around our garden to protect it from the hens.  So, now I guess you can see why I thought the title for this post should have been “Farming 101.” We all learn as we go and the big conclusion for us is, we can live without roosters. They eat more and take food from the gals. Maybe the hens will be able to plump up more. They may even lay even larger eggs when the roosters are no longer a factor in their daily ability to feed. The roosters are rough on the gals and several have the bare patches on their backs and we all know why.

So, I guess it is safe to say, we are just going to be hen owners from now on. We have weighed all the options for us and it just seem like the more practical thing to do. So, you won’t have to guess what will be for dinner this week at our house. I just hope we have a few days without rain, so we can get our chores done.

Many blessings to you all! 

Tuesday, February 19, 2013

Starting Seeds

Papaw kept saying this past week, that it was hard to think  it is already time to get seeds started.

Last night, I took some time to get a few packages of seed started. We have never used this brand brand before. We decided to try 100% organic seed. Some are heirloom and we are in hopes of being able to save seeds this year. I want to find heirloom squash seed. I hear squash is an easy seed to just freeze and save over year after year.

I must say, I thought these seeds were expensive in the scope of seed prices. We paid $2.18 per pack and each pack had very little seed in them so, if you are looking at 100% organic seed and need a lot, you may want to take that into consideration. I hope they sprout and produce good fruit this year. If so, I probably won't be as put off by the price that we paid for them.

Last year, most of our seed came from our local co-op and was not organic. We tried several varieties and were disappointed with many of them. Papaw had to replant a few times.  He wasn't sure he wanted to buy seed in bulk there again this year. I guess we will have to wait and see. 


We decided to give Asian snow peas a try this year along with sugar snaps, which we will be planting those straight into the ground in the next couple of weeks. They like the cooler weather. 

Our winter here so far has been very mild. We had one snow that left us a few inches that laid around for about a week or so. Since it has been so mild, we were able to keep collards, kale and turnip greens going in the garden most the winter, which made our chickens happy. I have been cutting and giving them greens for the past several weeks and it is a treat.

The spikes in the temperatures and the sunny days, sure are sure starting to get us itching to dig in the dirt. I know it is still a bit soon. I guess with at least getting some seeds started, it satisfied my gardening desires for now. 

Hope you all have a very blessed week!

Monday, January 28, 2013

Healthy and Delicious? Yes, It Is Possible!

A lot of us may have a concept that, things that are healthy are not necessarily tasty or good. Well, I am learning the opposite is true. These days, I am finding creative ways to make substitutes to create healthier and honestly, tastier dishes. I have been having fun in the kitchen, which is amazing. I have never been one that enjoyed cooking.

In my quest for us to eat healthier, I have found Clean Eating magazine. Wow, I love this magazine. I can thank the Clean Eating magazine for my recent inspiration and creativity in the kitchen. The magazine has been a real eye opener for me. It has helped me to look at adding ingredients that may not be traditional to a dish or, substitute ingredients that I never thought of before, making healthier meals for us. You may want to take a look at the Clean Eating website. They have tons of good pointers and recipes there too.

I picked up a copy of the magazine and one of their cookbooks called, The Best of Clean Eating. I ran across a recipe for a turkey/sweet potato cannelloni pasta dish that looked amazing. The idea of using a sweet potato for the filling instead of heavy cheeses sounded so appealing. It called for using whole wheat pasta and I looked everywhere to find whole wheat cannelloni, but could not. I will in the future, learn to make my own. I have made pasta before and it is very easy so, whole wheat shouldn't be a big deal to make.

Since I could not find the whole wheat cannelloni, I decided to make this dish as lasagna. If you have ever been to the DeKalb Farmer’s Market in Atlanta and sampled some of the different types of lasagnas in the cafe there, you will understand my quest to try this. They have some amazing spins on lasagna at the farmer's market cafe. No longer will I look at this dish with just the traditional ingredients in mind.

I made this Turkey, Sweet Potato Lasagna for our Sunday dinner and it was amazing. I can honestly say good bye to ricotta and mozzarella cheese lasagnas. I found this recipe so tasty and delicious. It truly has more flavor than traditional lasagna and it is healthier.  Oh Yea!

So here is the basic recipe and directions. Sorry, I didn't take step by step photos. I think I was just more into making the dish and enjoying the process, to stop and take photos.  Here are the ingredients you will need.

Turkey and Sweet Potato Lasagna with Goat Cheese

2 fairly large sweet potatoes
2 Italian Turkey Sausage links plus one pound of ground turkey
½ cup of chick peas
2 cups of fresh baby spinach
1 handful of fresh basil (chopped)
1 large onion (diced)
3 large cloves of fresh garlic (minced)
1 large egg
1 ½ cups of goat cheese
3 tbsp grated Parmesan cheese
1 tbsp oregano (dried)
½ tsp of cinnamon
¼ tsp nutmeg
½ tsp salt, 1 tsp pepper and 2 cups of your favorite marinara sauce


Here is what it looked like before we devoured it.

OK, so before I start with the step by step, let me apologize first. I am not a very good step by step writer. I would really never make it as a cookbook editor. With that being said, hopefully you will still get the just of my recipe and process. It isn't rocket science after all.

So, what you will need to do first, start the sweet potatoes baking in oven or microwave. I microwaved mine. Start a large pot of water to boil for cooking pasta. Add a pinch of salt to the water and a drop of olive oil. This time of the year, I welcome the humidity in the house from a boiling pot of water. It helps to cut down on static electricity. You should see the dust sticking to the front of my stainless fridge. Oops, sorry, back to the directions.

While potatoes are cooking and water is coming to a boil, chop onion, garlic and fresh basil. Place about a tsp of olive oil in a skillet with onions, garlic, Italian turkey sausage and ground turkey.  Add salt, pepper, cinnamon, nutmeg and ½ tsp of oregano. Cook over medium to high heat until brown.  Remove from skillet.

Peel skins from sweet potatoes and place in a large bowl, breaking them up a bit with a fork and leave to cool.  When the potatoes have cooled a bit add one large egg.  Add a bit of olive oil to a skillet and braise baby spinach for a couple of minutes. Remove from skillet and add to the sweet potato mixture. Also add chick peas. Stir gently. You want to break up your potatoes but not turn them into a mashed mixture. I had veggie lasagna once that had nuts in it and it was delicious. At this point, you could add pecans or nuts.  I only added chick peas. Next time, I am thinking about trying nuts or a few sunflower seeds. I would love to hear about any added ingredients that you may try.

At this point, preheat oven to 375 degrees.

Cook lasagna noodles for about 12 minutes or less in the boiling water. You only want them slightly cooked. They will finish cooking in the oven.

Lightly oil with olive oil a 9 x 12 or so, oven safe, glass dish. Arrange and layer pasta, sweet potato mixture along with the browned turkey. Adding small chunks of goat cheese between layers. Continue this until the dish is full with the last layer being pasta. Top with a few tablespoons of marinara sauce. Sprinkle with remaining oregano and Parmesan cheese. Cover with foil and vent by lifting one corner.

Bake for one hour and 15 minutes or so. I was surprised, this dish did take a bit longer to fully cook through. I do believe if you try it, you will be pleased and amazed. Oh, and did I tell you, it is delicious?

Blessings All!

Friday, January 11, 2013

It Doesn't Get Any Fresher...

Last night, Papaw took down two of our Barred Rock roosters. We wound up with six out of the clutch of chicks we got back at the beginning of last summer. We had already put two of them in the freezer a while back. So, we are down to two roosters now. We are pretty sure this should be about all we need for eleven hens. I guess we shall see.

We had been waiting to see which ones were more dominate and which ones we may wish to keep. We may regret this but we took out two of our feistiest roosters. They were being too aggressive we felt. They were pulling feathers from our hens and just had a general bad disposition. Papaw just wasn't going to put up with their abuse towards him either. He had been attacked a few times in going into the hen house and to feed. He said he understood their need to protect but they were just overzealous. He too wanted to see how one of those fellows would taste as a chicken noodle soup with dumplings. So, that is what we had for dinner last night.

After Papaw got off from work, he started the water boiling out there in the barn and got busy. He always takes care of our birds and I do not have to witness any of the the carnage. He gave me a call and told me to bring my soup pot and come to the barn. I walked in the door toting my big kettle. He put up hand and stopped me from coming too far into the barn. He didn't want me to see any of the mess. I held out my pot, turned my head and he placed this bird in my pot. It was kind of funny. I stewed up that big old boy and made this.


It truly was amazing and delicious. I have always heard folks say, nothing beats a fresh bird and they are right. I didn't have any frozen peas but I had soybean peas so, I used those instead. I had quiet a lot of it left over and I think I am going to freeze it in smaller package for using to make pot pies.

Thursday, January 10, 2013

What's for Lunch?

Lunch is one meal that for me, gets worked in here or there. I have no real committed time for lunch. I am pretty darn bad too about breakfast. I may have breakfast and sometimes not. I have to change all of that. I have a real weight problem that I have struggled with most of my life.

A few months ago, I finally broke down and joined the gym. My guys had been on my case forever trying to get me to go to the gym with them. I will be forever grateful for their encouragement, love and support. I am down about 30 lbs since I started. I really enjoy it and it feels great to be working on getting back into shape and getting the benefit of the extra spunk that comes with exercise. A couple of things that I know must change are, my meal times and also, making time to put good effort into healthy eating.

Today for lunch, I made a delicious Korean slaw. I am smitten now. My love for Kimchi and the pursuit of learning to make it, inspired this dish today. I made Kimchi this morning. The aroma of the ginger was too much for me so, I had figure out a way to work it into lunch. There is something so pleasing about the smell of fresh grated ginger that I absolutely love. Since I have to wait 3 days for the Kimchi to ferment, I had to come up with a healthy meal choice that I could add ginger to. I had a bag of grated cabbage for making slaw so, I added a few things. 


I almost broke out the chopsticks. 

Korean Slaw
(single serving size)

1 1/2 cups of grated cabbage
1 handful of match stick carrots
2 tablespoons of sunflower seeds
1 green onion, chopped
1 teaspoon of fresh grated ginger
1 clove of garlic, chopped
a pinch of sugar
1 teaspoon of Asian Fish Sauce
1 teaspoon of balsamic vinegar
1 dried chili pepper, crumbled (optional)
You could use pepper flakes instead of a dried chili.

Put all the ingredients into a bowl and toss well. That's it. It is simple and delicious, really!

Hope you enjoy!

Related Posts Plugin for WordPress, Blogger...